Wednesday, November 26, 2014

KISS Instawave Hair Curler

*I received this product for free for testing/review purposes. All opinions expressed are my own and freely given*


Every straight haired girl dreams of having curly hair at one point or another, but actually curling your hair can be a major pain and takes forever. There are lots of devices on the market claiming to make curling your hair easier, and the KISS Instawave is one such item. I was given the opportunity to test it out and see what I thought and unfortunately I did not like it at all. Part of the problem is my hair is so long the product just doesn't work well. I know fellow bloggers who tested it and loved it, and they all had medium length hair so I'm fairly certain hair length played a major part in my feelings for this device.


What makes the Instawave different from regular curling irons is there is no clip and you yourself don't wind your hair around the shaft, the device does it all for you. The concept is really neat, and I can see how this would really speed up and simplify curling hair that isn't Rapunzel long. I also liked that you can have it curl either clockwise or counter clockwise, which would help to give you more natural looking curls.


Let's start at the beginning. See, uber long hair. I'm trying to grow it out to my butt so it is not getting cut any time soon. And yes, that is a Doctor Who shirt.


I divided my hair in half and then tied the top half up to make things a little easier to curl, otherwise the non-curled hair always gets mixed into the curled hair. You want to curl in one inch chunks, just like with a regular curling iron. I suggest using a heat protecting spray for this, it gets HOT! There are two settings, a low (loose curls or waves) and a high (tight curls), but the low was so hot I was afraid to try the high. The first time I used this I could hear my dry hair crackling from the heat and I actually burned my finger testing it out. So be careful lovelies, don't burn your hair off!


There's this tab that rotates around, you probably saw it in the video, you want your hair to be in between that and the actual heated shaft. Try and get close to your head and keep  it parallel to your hair (I did not during the pictures, was trying not to burn my ear).


Now push the turning button and that tab will spin around and curl your hair around the shaft. Hold in place for about 6 seconds, then pull straight down to slide the curling iron out of your hair and you should have a nice curl.


The curling aspect really works, I got some nice ringlets from doing it as you can see. Now onto the bad stuff. This is suppose to be a tangle free device, and I have to disagree with that.


See that? That is the hair that got tangled and ripped out after doing two chunks of hair. If you look in the spinning video you can see my hair there too. I think because of how long my hair is it is just going to get caught no matter what. And about every third attempt I'd get my hair so tangled I'd actually start to panic about how I was going to get my hair out before it set fire to my head. I haven't seen that complaint from any of my shorter haired bloggers so I'm pretty sure this just isn't designed to handle hair this long. Which is a shame. The other bad thing is it emits a high frequency buzzing sound the whole time it is plugged in, which gets REALLY annoying about 10 minutes in. No idea why it buzzes, that seems like a terrible design flaw to me. I would actually return it if I had bought it because of that buzzing.


Here is a video of it in action, you can actually see it tangling and ripping my hair out. I was not very happy as you can probably see on my face.

Would I recommend this to other people? Sort of. If they have shorter hair and don't mind buzzing sounds in their ear the whole time then this product would work great for them. Will I be using it again? No, I'll stick to my regular old curling iron.

For more info on the product please visit http://www.kissinstawave.com/

I received this product for free for testing/review purposes. All opinions expressed are my own and freely given.

Tuesday, November 25, 2014

Tutorial Tuesday: Exfoliating Facial Wash


I was looking at some really nice (aka expensive) facial scrub the other day when I realized they are basically a facial wash with a scrubbing agent in them. So my gears got turning and I decided to make my own. Turns out it was really simple and used two items that I already owned. So let's get this started!


To make this exfoliating wash you will need:

  • A facial wash you like. I used one I'm trying to use up but do like.
  • Salt. You can use regular salt, sea salt, or kosher salt like I did. A finer salt will give you a finer scrub, while a courser salt will give you a rougher scrub.
  • A container to put it in. I used my trusty mason jar.
  • A stir stick or spoon. I got lazy and used the first thing that was in arms reach, a cuticle stick.

First, pour 2-3 tablespoons of the salt you are using into the container you picked out.  I like to make my stuff in smaller batches so I can adjust as my skin changes throughout the season.


Now pour in enough of your wash until it is just a bit more than the amount of salt you added.


And stir, then you are totally done. To use just use it like you would a facial wash, making sure to massage it in to fully enjoy the scrubby goodness you just made.

Monday, November 24, 2014

Rainbow Dotted Mani Monday

Hello and welcome to this week's Mani Monday! This week we're doing a fun, but time consuming, dotted manicure. My friend from work was my stunt nails again (thank you!) and I'm blaming all my blurry photos on her inability to sit still. This manicure took me about an hour to do, but that's including taking pictures and some chatting. But just to be on the safe side give yourself an hour to do the whole manicure.

To do this manicure you will need:

  • A base color. I used that robin's egg blue I love so much
  • A rainbow of colors, I used red, orange, green, blue, and purple
  • A dotting tool or toothpicks
  • Piece of paper
  • Clear top coat
  • Nail polish remover and swabs/q-tips

First things first is your base color. I did three coats so it was opaque and streak free, but that will depend on what nail polish brand you use and the specific color. Make sure you let this completely dry before moving onto the next step.


Using your dotting tool of choice, dot the red nail polish (which you put a blob of onto your piece of paper for easy access) onto the top section of your nails. I like to do a combination of a larger and smaller dots just to shake up the texture. Let this dry completely before moving onto the next step.


Now you are going to do the same thing with the orange, slightly overlapping the red dots with the orange dots. It should look like a fade from the red to the orange. Make sure there are orange dots completely by themselves so the next color can start there too. Let this completely dry before you move onto the next step.


Now do the same thing with the green, slightly overlapping the orange and extending down like we did with the orange. Let this dry completely before moving on.


Now do the same thing with the blue.


And then the purple. 


Let them dry completely then top with the clear coat and clean up the edges with some nail polish remover. And you are all done! 

Saturday, November 22, 2014

Weekend Tips and Tricks

The weekend before Thanksgiving, is anybody else panicking a bit? I'm doing all my test runs this weekend so hopefully turkey day will go smoothly, or as smoothly as a big family holiday can go. Here are some tips and tricks to help your beauty routine run as smooth as you want your gravy to be.

Tip #1: Want curly hair but really don't have the time to sit there and use a curling iron? Take a page from the 1940's and do it the night before. Cut thin stripes out of an old t-shirt and use them to wrap chunks of your hair up like you would with rollers. Tie the two ends of the strip together do you have a little bundle of hair, then do that for the rest of your head. Go to sleep and you will wake up with some great, no heat curls with no real work in the morning. Do this on slightly damp hair for even better curls.

Tip #2: Hydrate, hydrate, hydrate! The cold winter air is sucking all the moisture from your skin, so make sure in addition to using lotion every day you are drinking plenty of water. It will not only keep you feeling great but will help you look your best. Dehydrated skin will be saggy and dried out and just won't have that youthful glow we all want. So drink up!

Tip #3: Extend the life of your manicure by painting the actual tip and part of the underside with your clear top coat. This seals down the edge of the polish and makes it a bit harder to chip off. While you won't be chip free for a whole week, it can give you an extra day of nice looking nails.

Tip #4: That aloe gel you bought over the summer for that nasty burn can continue to help you during the winter months. Apply it to wind chafed cheeks after that all day snow boarding adventure. Unsharp razor leave you with some nasty razor burn? Aloe that baby up! New face mask leave you with raw, red, and angry skin? A little aloe gel with help soothe and replenish your poor skin.

Friday, November 21, 2014

November 2014 Birchbox


My favorite time of the month is when my Birchbox arrives, it's like a mini Christmas every month but only pretty things for my face. For those who don't know, Birchbox is a monthly subscription service that send you customized boxes of makeup and skin care goodies for only $10 a month. I love Birchbox and my last box was super perfect for me, so I was due for a crappy box. My November box was not a great one for me, I'm a little bummed. But I got $6 to spend in the Birchbox shop from reviewing the items, so it wasn't a complete loss.


This month Birchbox teamed up with Red in the fight against AIDS. The mailer box is red and covered in AIDS/HIV facts and every time you share it with the hashtag #shaRED they'll donate $1 to AIDS research. The facts are really fascinating and I am going to be sharing them as much as I can on Instagram to help raise moneys. The actual box theme was giving but I apparently threw the cards out so I don't remember what all was on them. Oops.


I'd like to apologize for the horrible pictures, my camera freaked out and it took a bit to get it fixed and I never went back and retook the photos for some reason. My first look was good, I love seeing a nice and full box. I was originally excited by what I was receiving, they just ended up being not so great in person. I'll go through the box piece by piece and as always include prices for my samples and a full sized.


The only full sized item I received was this Eyeko eyeshadow crayon in the shade Satin. I had never heard of this brand and was really excited to try it out. I love eyeshadow and the idea of a quick swipe with this thing made me super excited.


The color is a neutral metallic color, not super pigmented but enough that it'd be nice to keep in my makeup bag. The problems arose when I tried to wear it. First, this thing creased badly. Like, before I had even finished the rest of my makeup it had creased up enough it looked terrible. And the crayon is hard, I had to press pretty hard to make it show up on my eyes. I could probably apply it over primer and set it with powder but that's a lot of work for an eye crayon. I'm just going to use it for a pop of color at the corners of my eyes, so not a total waste but not what it was suppose to do. This comes in a three pack for $15, making this $5. That's half the value of the box right there, a pretty big let down.


I always keep a small lotion in my desk so I can apply it throughout the day. Getting a fancy lotion for my desk was a double win. Until I saw the size. I should have taken a picture next to my hand for scale, this is a tiny tube. Like the size of the Dr Brandt sample tubes or a third the size of a travel sized tube of lotion. Now it does smell amazing, lemongrass vert and sparking grapefruit, and it is a really nice lotion, but damn is it tiny. A full sized of the Camille Beckman Platinume Gold Imperial Repair Hand Therapy cream (told you it was fancy) is 6 oz and retails for $20, making my baby sample worth a whopping 83 cents.


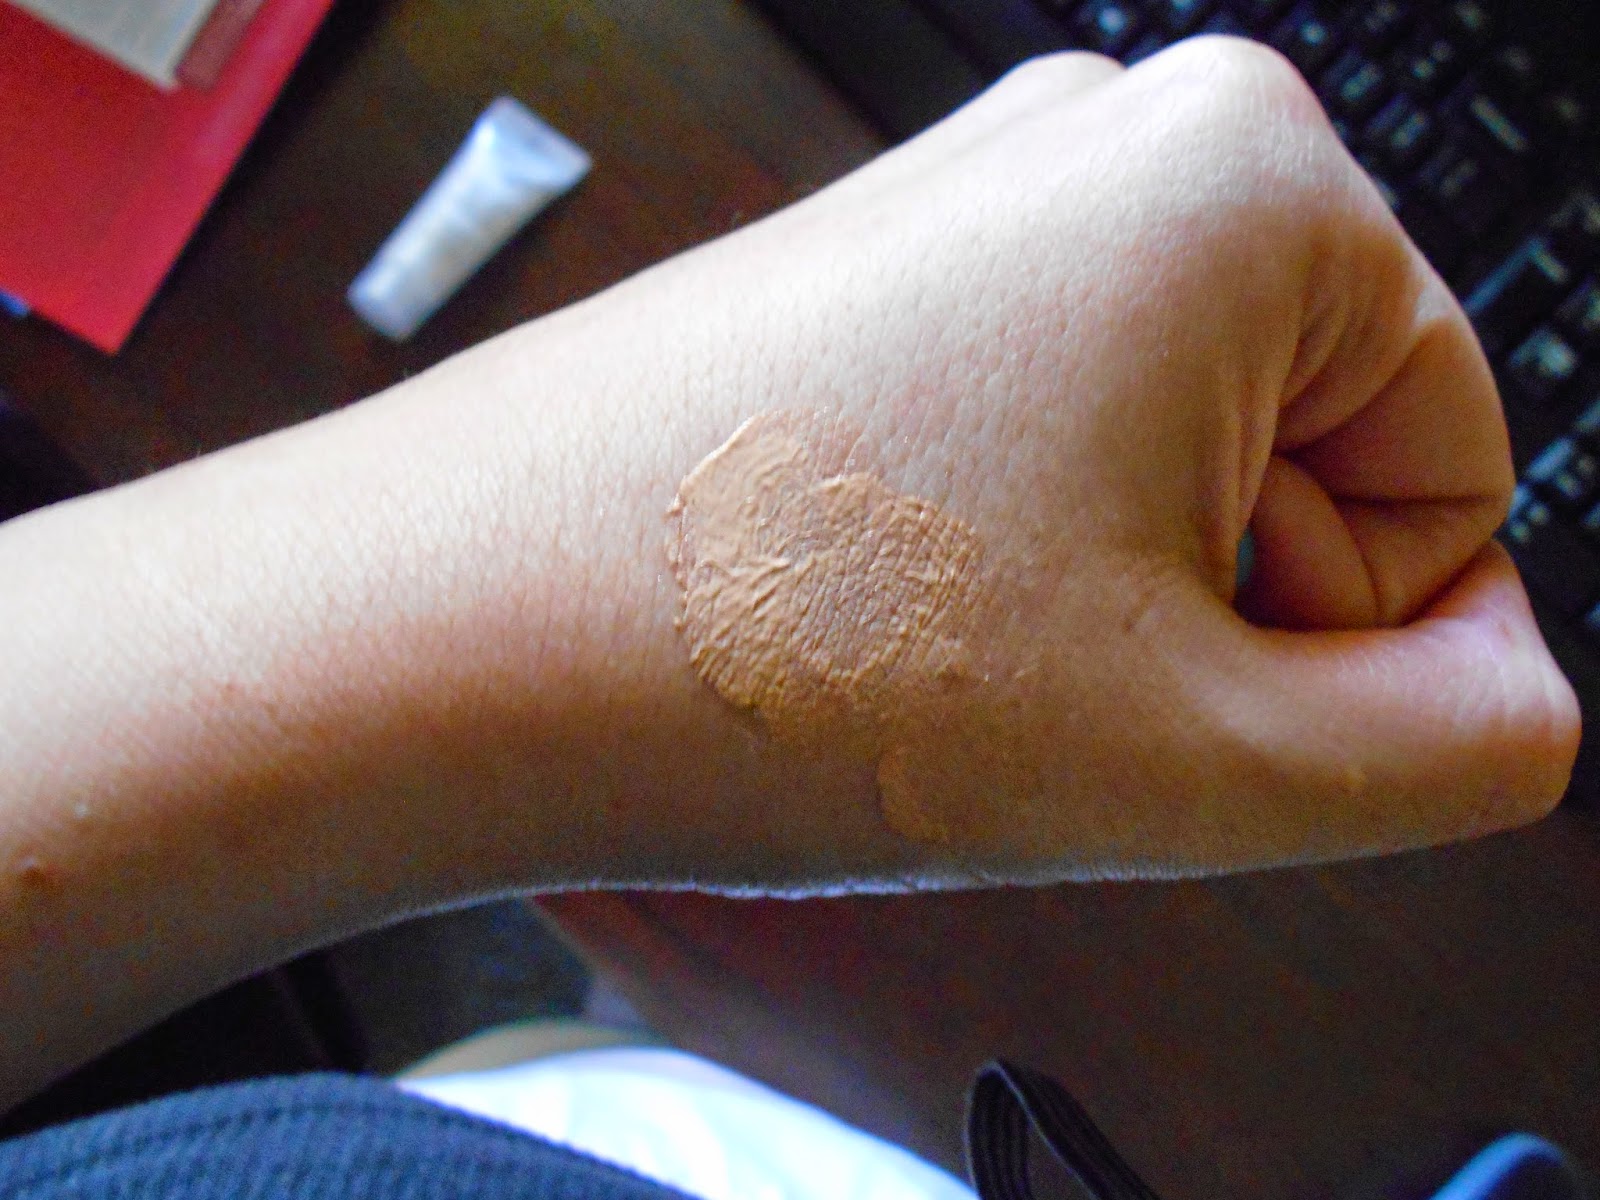
The Jouer Tinted Moisturizer was one of items I was pretty excited to try, it is a pretty popular item and has really good ratings. The tube is pretty small, about the size of the lotion but not as full, which was yet another disappointment. And while it is very sheer I've learned you don't need very much of it so I've managed to get quite a few uses out of my little tube.


The shade I received was Golden and it actually blended out much nicer on my face than on my hand. It gives you this really pretty sheen/glow, like an expert put highlighter on you. I really liked it and I will probably pick a full sized tube up this summer when I like to wear lighter makeup. It also has SPF 20 in it, so perfect for the summer. The only real downside is it is expensive! A full sized tube is 1.7 oz and retails for a heart attack inducing $38! This is a Birchbox points plus a good coupon code sort of item for me, my budget is so not $38 for one small tube friendly. But I've received so many complements of how great I look when I wear it that I'm just going to suck it up and buy a tube later. My sample has a value of $3.80.


This is the item I was most excited for, the Number 4 Super Comb Prep and Protect spray. I have super long hair so any hair care stuff is more than welcome. And I know Number 4 is a REALLY high end brand so I couldn't wait to try it. It smelled great in the bottle, smells fancy and expensive to be blunt, but when I sprayed it in my hair something went horrible wrong. It made my hair, and I am not exaggerating here, smell like a hamster cage. A legit hamster cage. Not something I ever want to smell like on purpose. After about an hour the scent evaporates and my hair just smells like my conditioner, but this is a no buy more me. The Beauty Protector spray (which I received last month in my box and loved so much I bought a full sized one) does the exact same thing, smells like cupcake heaven, AND costs quite a bit less. A full sized bottle of the Number 4 is 200 mL and retails for $32, making my sample worth $4.80. This was my second most valuable item, so not a great box for me.


Everybody got a bonus goodie this month of the chocolate variety and mine was the Chuao Chocolatier Pop Corn Pop bar. This thing was yummy you guys. There were actual pop rocks in it, which was super fun, as well as I think puffed rice cereal and the actual chocolate was sooooo good. They make lots of different types and I was actually going to buy the combo pack so I could try them all but Birchbox is sold out right now so I'll have to pout and wait. I may check some of my local fancy stores and see if they carry this brand, I would buy another one of these in a heart beat. My little bar retails for $1.24 and is only sold in an 8 pack with the other flavors but a full sized bar is $6 and can be bought by itself.


My last item was the new (?) Harvey Price scent, called Petaly Noir. This is a musky, heavily floral scent and was not my cup of tea at all. It wasn't a bad scent at all, just to heavy for me. I'm very picky about perfume so I doubt any perfume I receive from Birchbox will end up a favorite. I'll be passing my sample onto a friend. This also didn't have a cap, which I thought was weird since it's a spray vial. A full sized bottle is 50 mL and retails for $55, making my sample $1.10.

All total, including the bonus chocolate, my box came to a value of $16.77. I received 60 points for reviewing each item, which equals $6 I can spend in their shop. Of the items I received I only loved 2, so really not a great box for me. My last two boxes were almost perfect so I was due for a crappy box but I really hope next month is better. I won't cancel if it's not, the points system is just to good to pass up and I have found several new favorites through them. The sample sneak peak I've seen for December looks promising so far, so fingers crossed for a great box!

Thursday, November 20, 2014

Thursday Thoughts

Another week, another Thursday. This week will be a quick one, not a whole lot going on right now. As usual I am participating in Ramblings of a Suburban Mom's Thursday Thoughts link up.


Oh man, Thanksgiving is coming up fast! I'll have that whole week queued up so I won't be able to respond to comments for emails till after that. Holidays are busy yo. I'll be doing the same for the week of Christmas as well, just to give you guys a heads up.


I'm working on a few makeup items for Project Pan, and I'm making really good progress so far. I finally hit pan on all four shadows in this Wet & Wild palette, how impressive is that? I actually have one item out of the four I chose completely done, and another almost done. Fingers crossed that I get everything finished this month.


The Birchbox book club book is a fantastic pick this time, I'm so excited to read it! Amy Poehler rocks, and her autobiography is bound to be a riot and moving and powerful all at the same time. Is anybody else reading it this month? I should have a review up of my thoughts in the next week or so.


So I've been testing out this mascara for the last month, and while I liked it at first it seems to have dried out pretty. It seems to be pretty clumpy right now, which is soooo not sexy. I've heard so many good things about this brand, so I'll try one of the other mascaras they've put out before I discount the whole line. What's your favorite mascara of all time? I loved the new Urban Decay one, Perversion, though the price makes me cringe.

Wednesday, November 19, 2014

Birchbox Haul and Gillian Flynn Book Review

This post is a bit of odds and ends I decided to glue together rather than have a few short posts this month. I placed an order with Birchbox last month, so consider this my "haul" post, as well as my review of the trio of Gillian Flynn books that was the choice for the October Birchbox book club.


My haul consisted of a thing for me, a thing for my husband, a free gift, and my free mystery pack. I'll just go left from right to make this simple. The gift for my husband is an Art of Shaving introduction kit. It comes with a pre-shave oil, a shaving cream, an after shave balm, and a badger hair brush. I got him the unscented set, but there were a couple of different choices. So far he seems to like it, and I LOVE how soft his face is with it. I think we'll be purchasing some full sized ones later this month with my 20% off coupon. I bought a full sized Beauty Protector spray since I loved my sample from my October box so much. The little yellow bottle is Not Soap Radio in their joy inducing scent, which smells like lemon sugar. I've already used it once for a bubble bath and I am in total love with it. I will have to track down all of the other scents and give them a try for sure. This was part of my mystery two pack that you get free with $35 purchase. The other part was that round thing, which is a mirror. Yes. A friggin mirror. From one of the CEW boxes they put out during the spring. I feel a bit cheated there. I know I'll use the mirror so I'm not pissed, but I'd have liked a beauty sample of some sort. And lastly is my free gift, that TINY little tube on the right. It's the Supergoop eye cream, which I was excited to try till I saw how teenie a sample I got. If I had known how tiny it was going to be I'd have picked something else instead.


I was given all three of Gillian Flynn's books by Birchbox because I am a Birchblogger so I could read and review them on my blog. Gillian Flynn is the author of Gone Girl, which is currently a movie out in theaters right now. I for some reason didn't take a picture of Gone Girl, but that was the book I read first. Consider the rest of this post one big spoiler on all three of the books, so proceed at your own discretion.

Gone Girl. I actually really liked the first half of the book, when it was just Nick (the husband) talking and bits of Amy's diary. Then I got to the big "twist" and I was 300% done. Seriously, the book tanked after that. Nick wasn't a likable character to begin with, and Amy turned out to be a raging psycho. Everybody in that book was awful, nobody was even remotely likeable. And as far as the big twist, I think someone was to impressed with her own cleverness to actually focus on writing something decent. I think she should have left it open ended, let the reader decide what really happened. The whole "Amy faked her own death then trapped Nick in a weird loveless super creepy almost murderous marriage with a baby" thing just felt sloppy and shoddy.


Second book I read was Dark Places, and I actually really liked this one. Gist is girl's whole family was murdered by what she believed was her brother in some satanic cult thing. She lives like twenty some odd years believing that only to be forced to dig into it and discover the truth. The actual killer was a HUGE twist, it actually gave me chills. Turns out to have been two murderers, an "angel of debt" the mother hired to kill herself so the family can have her life insurance money to save the farm/defense money for brother who was accused of satanically raping a bunch of children (totally fake) and the other killer was the brother's PREGNANT girlfriend. There was a ton twists and turns and it was a really good book. I do not regret reading it at all and I know my husband is looking forward to reading it next.


Sharp Objects was the last in the trio and let me just say if profanity and an angry blogger are things you want to avoid than I suggest you quit reading right now. Right, so I'm going to be blunt. I FUCKING hated his book, it made me so god damned angry I'm contemplating setting the damn thing on fire.The plot was straight out of a 90's psychology text book. A mother with a deadly case of Munchhausen by Proxy (forces others, typically children, to be sick so they can swoop in and take care of them, gaining lots of attention from others for their "selfless care". Typically ends in the death of the child), a daughter who goes all crazy pants and kills other small children, and an adult daughter who carves words into her body and as a journalist solves not only the murders of the small children but discovers her mother killed her little sister. Straight 90's pop psych. Gave me flash backs to school (I majored in Psychology before I ran out of moneys). So some garbage plot, but that's not what has be foaming at the mouth angry. There has been articles circling around that Gillian Flynn is a misogynist due to her treatment of female characters, but all the articles I read talked about Gone Girls. And yes, there are no good female characters in Gone Girl, they all suck. But Sharp Objects is the book that really cemented the "you are a huge misogynist" for me. There's a passage where the main character, the cutter, is telling the out of town cop stories about violence in the small town (all violence against women I'd like to point out) and she tells him about "an eighth-grade girl got drunk at a high-school party and four or five guys on the football team had sex with her". That there is rape folks. But wait, it gets better. The cop is understandably upset that that happened and the lady gets pissed, PISSED, at him for calling it rape and saying it was wrong and they should have gotten arrested. The kicker is it was her own rape. She thinks women get what they deserve. There was a whole theme of violence against women, especially of the sexual kind throughout the whole book. And the sexualization of young girls honestly made me sick to my stomach. You are a special kind of fucked up when you can write chapters upon chapters about how hot and tight and smooth a 13 year old girls body is. The book is a pedophiles wet dream, all these children having sex and being sexually aggressive. It sickens me. I want to know what the hell has gone so wrong in your life that you decide one day to add stories about young girls being forced to shove sticks up their vagina's to your novel. Like, what the hell? There are other ways to show the antagonist is a psycho besides writing about sexual abuse and assaults none friggin stop. Everything about this book makes me angry.

Two out of the three books sucked and I would not read again at all. In fact the writing in Dark Places is so good I can't help but wonder if it was written by the same person. I will not be rushing out to buy her next book, that's for sure.


The November book club choice is Amy Poehler's new book, Yes Please, which is sort of an autobiography. I can't wait to get started on it, I think it's just what I need to wipe those horrible books from my brain. Amy Poehler is hilarious on SNL and I just thinks she's an awesome person in general, I'd love to grab a beer with her and just chat. I'll be doing a review of this later this month, probably the Friday after Thanksgiving. Anybody else reading it?

Tuesday, November 18, 2014

Tutorial Tuesday: Toner Revisited

Hello and welcome to this week's Tutorial Tuesday. We are revisiting the homemade toner again, I loved the last one but, with the weather changing here and the added stress of the holiday season I needed something a little different for my skin. This is a stronger toner than the last one, with an added moisturizing bonus to help combat that dry winter skin.


For this tutorial you will need:

  • Witch Hazel
  • Rosewater
  • Tea Tree Oil
  • A hyaluronic serum of some type
  • A jar with a lid, I used a mason jar again
  • Cotton swabs, the flat kind
  • A 1/4 cup measuring cup

First, measure out 1/4 of a cup of the witch hazel and then our it into your jar.


Now measure out a 1/4 of a cup of the rose water, and add it into the jar.


I added in about 10 drops of tea tree oil, you can add more or less depending on your own personal preferences. Do remember that tea tree oil has a rather strong scent so the more you use the stronger it will smell.


I also added a dropper full of my hyaluronic serum by Body Merry. It is my go to daily morning moisturizer so I added this to give my toner a moisturizing boost. You can obviously skip this part if you don't have any or don't need it.


Screw on the cap and give it a really good shake to really mix things up.


And just like last time, slowly add the cotton swabs 10 at a time until most of the liquid has been soaked up. You can double this recipe if you like, but I like being able to change up the recipe as my skin care needs change.