Showing posts with label Copycat Recipe. Show all posts

Tuesday, March 3, 2015

Peppermint Lemon Pampering Bath Bombs

I love taking baths, there is something so soothing and pampering about carving out an hour to just sit in a hot tub that I've thrown some sort of goody into. Typically I do some bath salts and essential oils, with some bubbles on occasion. But the real king of bath add ins has got to be the bath bombs. I showed you how to make a soothing Oatmeal Bath Bomb, now I'll show you how to make some pampering scented ones. And even with the add ins, a whole batch will cost you less than a single one from the mall.


To do this tutorial you will need:

  • 2 cups baking soda
  • 1.5 cups of citric acid. I bought a 5 lb bag of food grade citric acid on Amazon for under $10
  • 8 tablespoons of corn starch
  • 1/4 cup of sea salt. I'm using the Adovia Dead Sea Salt that I've reviewed here before
  • 8 tablespoons of an oil of your choice. I used light olive oil because I forgot to buy nicer oil when I was out running errands.
  • 20 drops each of lemon and peppermint essential oils. I'm using the InstaNatural Essential Oils I reviewed the other week.
  • Witch hazel in case your mixture is to dry.
  • A bowl to mix in, a measuring cup, and a tablespoon
  • A mold of some sort. I'm using my handy silicone cupcake pan. Perfect for desserts and bath goodies

First you will need to measure out the two cups on baking soda into your mixing bowl.


Now add the cup and a half of citric acid on top of that.


Next goes in your eight tablespoons of corn starch.


Then the quarter cup of sea salt.


Give it a good stir just to make sure everything is clump free and mixed up before we start adding in the wet ingredients.


In goes the eight tablespoons of the oil you picked out, in my case the light olive oil.


Right on top of the oil you will add the twenty drops each of your lemon and peppermint essential oils. If you want a stronger scent you can obviously add more of one or both of them.


Now mix everything up until it is a nice and even mixture. I find it is easier to use my hands once the oil has been mixed it. You want to watch out for dry chunks or oil pockets.


Your finished mixture should retain it's shape if you squeeze some in your hand. If it is to dry and crumbly put some witch hazel in a spray bottle and give it a few sprays, remix, then test again. Keep doing this until it retains it's shape. If you mixture seems to damp that's OK, it just means it will take longer to dry.


Now you want to scoop the mixture into your molds. I just put one handful into each cupcake spot to start out with.


Using something hard, I used the metal tablespoon, start pressing the mixture into the cups. You want to press any air and space out of it, so expect them to compact down halfway into the cup. Just add in any leftover mixture and keep pressing until you have used all the mixture. This made a dozen pucks in my cupcake pan, each at least three quarters of the way filled. Let dry overnight, then just pop them out and store them in an airtight container until your next bath. These also make wonderful gifts, and can be made in large batched. 


Tuesday, February 10, 2015

DIY Sunscreen + Lalune Naturals Zinc Oxide Powder Review

*I received this product free for testing purposes, all opinions expressed are my own and freely given*


First, a disclaimer. I haven't actually be able to test this and see how well it works. It is still winter in Oregon and I haven't seen the sun in like a month. But the science is sound so it should technically work just fine. But because I haven't personally tested it I wanted to let you guys know. Now that that is out of the way, let's get down to business (to defeat the huns! Sorry, I've always wanted to do that). Sun protection is an important part of my household. Obviously with a small child you have to be careful but I married a man so pale he bursts into flames if he steps outside during the summer. We go through a LOT of sunscreen every year, and sunscreen is not cheap you guys. The nicer brands with a higher SPF can be almost $20 a bottle and he'll go through that in a week depending on what we are doing (he's also a giant so lots of flesh to cover). I always worry about what is in the sunscreens we use and I can to avoid some of them because of my coconut allergy, so when I was given the chance to test out some Zinc Oxide Powder by Lalune Naturals and make my own sunscreen I was pretty excited. So let's make some sunscreen!


To do this project you will need:
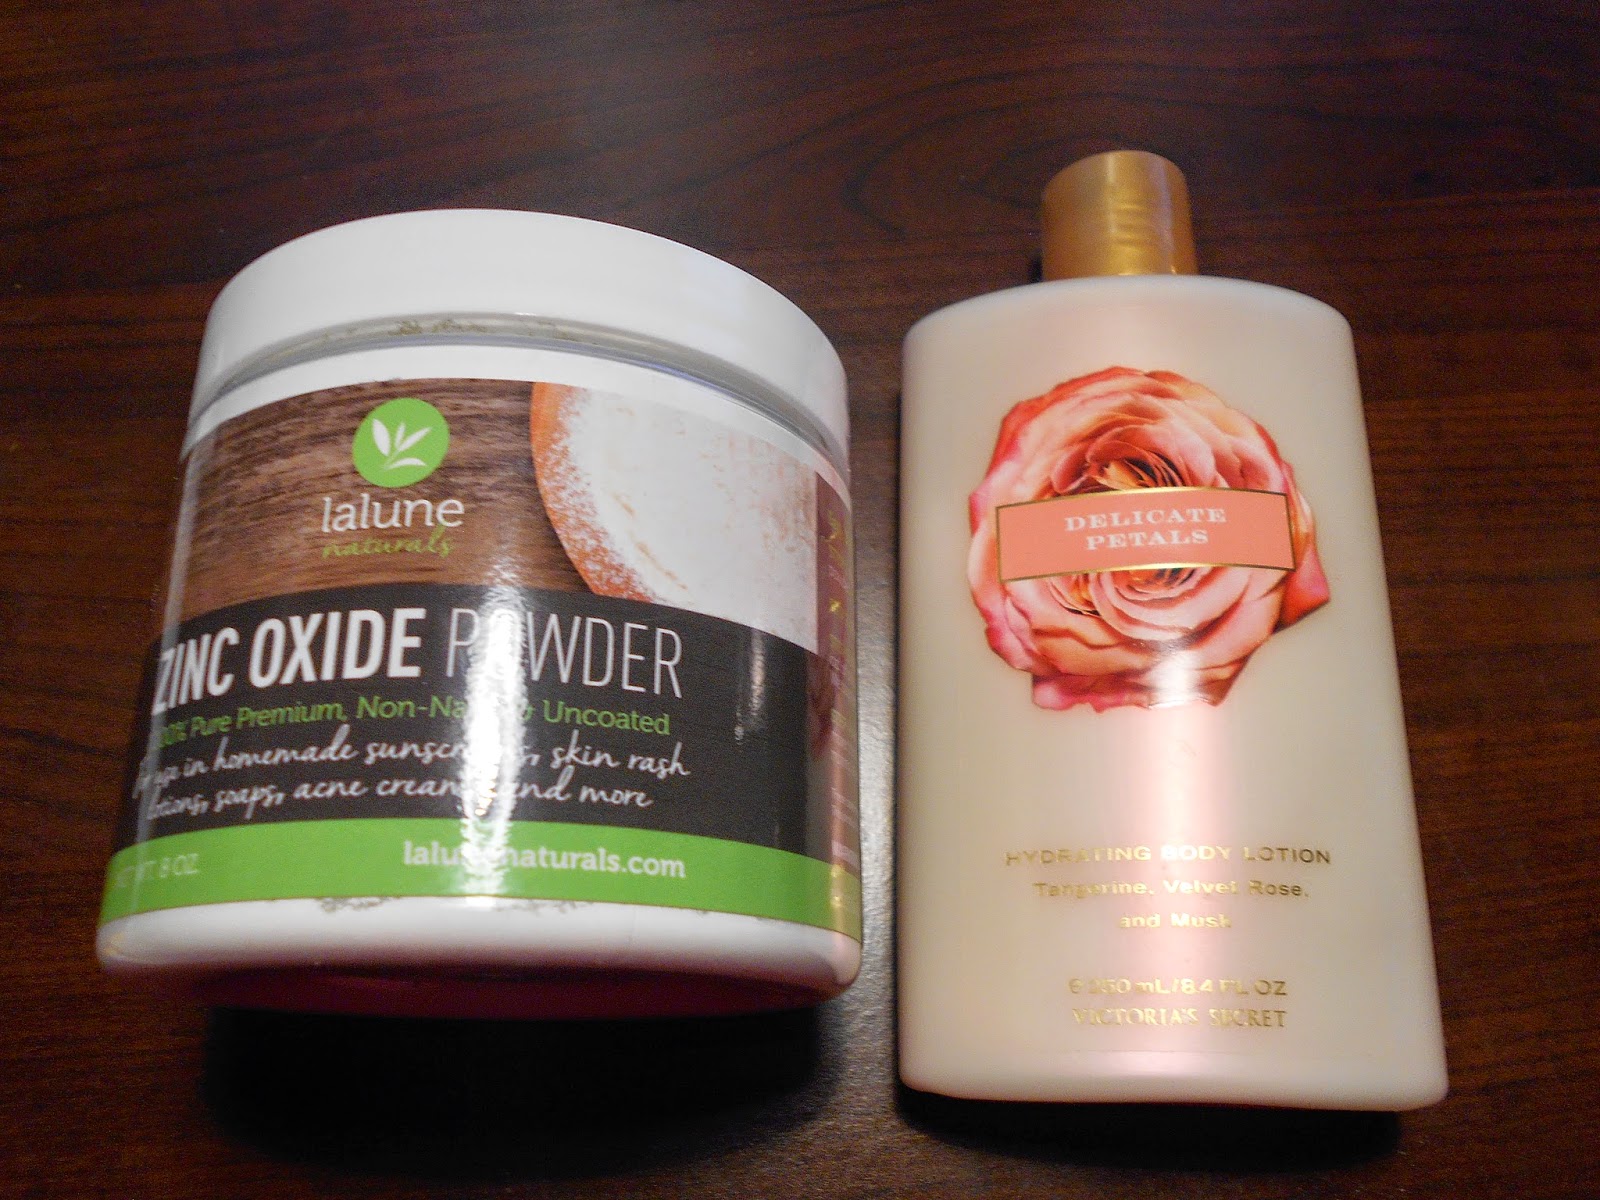
  • Zinc Oxide Powder. I am using the Lalune Naturals brand, which I really like so far
  • A lotion of your choice. I'm using a Victoria Secret lotion I really need to use up so this was a win win for me
  • Container to store the finished product in. I'm using a glass mason jar.
  • Measuring cup, spoon, and whisk.
  • Gloves and a protective mask to keep you from breathing in the powder 

I halved the recipe on the jar since I only had 2 oz of the lotion, so keep that in mind. Step one is to measure out your lotion. I measures 2 oz (1/4 of a cup) into a one cup measuring cup.


Next, add in two tablespoons of the zinc oxide powder. If you have a food scale and can measure it out, you want 1/2 an ounce but I don't own one so I just scooped it out with my measuring spoon. This is for a SPF 20+ sunscreen in case you were wondering.


Now take your whisk and start mixing. The lotion will thicken up quite a bit and get this really wonderful whipped texture like a body butter once you are all done. I recommend letting it sit and meld together for a few hours before you use it. Mine will be chilling for about a month before I have enough sun to actually use it. 


Just transfer it to your container and you are good to go. I did test it on the back of my hand and it does take a bit of blending to get it to soak into your skin and will leave a tiny tiny of white, but most sunscreens with a fair amount of zinc in it will do the exact same thing. I really liked the texture and it did NOT leave me feeling greasy like a lot of sunscreens can. Plus the scent was of my choosing, so that part rocks.

I love that this recipe is right on the jar, as well as instructions on to get to an eBook with a few more recipes. I really want to attempt to make deodorant at some point, and maybe a sunscreen stick for faces as well. I am really happy with the tube of zinc oxide, it is half a pound so I've got plenty for other projects and even has a scoop inside you can use.If you are interested in making some of your own health and beauty items like sunscreen, deodorant, or rash cream I recommend picking up a jar for sure. As of the time of this writing it is listed for $14.99 with free Prime shipping, which I think is a very good deal. That's the same price as a tube of sunscreen and I bet your could make two gallons of sunscreen with this so a pretty big money saver. 

Tuesday, September 30, 2014

Tutorial Tuesday: Scrubby Shampoo

I know, I know. Nobody wants to admit they have dandruff or any other less than awesome hair condition. But it happens, and as the weather starts turning colder here I know my head is going to get a bit (ok, a lot) flakey. I've tried some of the dandruff shampoos out there and have hated them all for the most part, one left a film on my hair so nasty I had to shampoo with dish soap for a week to get it off. So after much snooping around ingredient lists from very popular shampoos, I've come up with a homemade scrubby shampoo that will hopefully relieve all of out itchy head troubles.

One thing I noticed in most dandruff shampoo ingredient lists is tea tree oil, which I happen to have a giant bottle of. I also noticed a very popular shampoo from an overpriced bath shop that starts with an "L" contained a ton of salt for it's exfoliating effect. I already do a monthly pinch of baking soda into my shampoo to help strip off build-up, so making the leap to combining these wasn't difficult.

A word of caution, if you have never used tea tree oil in the past, please to an allergy test before trying this at home. mix a carrier oil (almond, olive, whatever) 4:1 ratio with the tea tree oil (so 4 parts oil to one part tea tree oil) and test it on the inside of your elbow. If you stay reaction free after 24-48 hours you are good to go on using it. You can make this recipe without the tea tree oil, it just won't be as potent. Tea tree oil has anti-fungal and anti-bacterial properties, which can help fix chronic dandruff caused by ickies on your scalp. Warning also that tea tree oil is very strong smelling so try not to spill it everywhere like I did.


I'm making a small batch because I'm dyeing my hair this Thursday and I don't want to damage my new color so I'm just making a few days worth. You can double the recipe if you would like. For this you will need:

  • Shampoo. Use whatever you already have and love, no reason to go out and buy something new
  • Salt. If you have sea salt use that, I did not so I'm using kosher salt for extra scrubbing power. Think about this like a salt scrub for your head
  • Baking powder
  • Tea Tree Oil. Rosemary extract will also work if you can't use tea tree oil
  • 1/4 cup measuring cup, a teaspoon measuring spoon, and I used a plastic syringe to measure out my tea tree oil but you can use the 1/2 teaspoon for it if you want

Measure out 1/4 of a cup of salt and put it in a plastic container that you want to store the shampoo in.


Measure out 1/4 of a cup of your shampoo of choice then dump it into the container with the salt. Make sure you scrape the sides down in order to get all of the shampoo out. Give it a bit of a mix. The salt will sort of dissolve, don't worry about it.


Now mix it half a teaspoon of the baking soda.


And finally add half a teaspoon of the tea tree oil. If you are concerned about sensitive skin you can add less, like 1/4 of a teaspoon. Now give it all a good mix and your shampoo is complete!


To use just scoop some out and give your scalp a good scrub with it. Hopefully you will start to see an improvement in just a few days.

Tuesday, August 26, 2014

Tutorial Tuesday: Homemade Jelly Soap

Greetings and welcome to this week's Tutorial Tuesday! This time I took my inspiration from a certain high end soap and bath bomb company that charges an arm and a leg for stuff. I figured I could easily make 90% of it at home for a ton cheaper (I was so right), so I sprinted off to Pinterest and starting searching for copycat recipes. I came across one for a copycat jelly soap and I thought that would be a fun project to make for my son, who is three. I simplified the recipe down a bit (ick, glitter in my soap? No thank you) and used ingredients that cost pennies on the dollar. So without further ado, here's how I made my jelly soaps.

My supplies, minus the whisk and measuring cups
To make these you will need:
  • 1/2 liquid soap. Because I made these for my son I used his tears free shampoo which I get at the Dollar Store, but any liquid soap will do.
  • 2 packages of plain gelatin. I bought a giant box last year so I could make homemade gummies (so not worth the trouble), so I already had these, but I think the giant box cost like $13.
  • A silicone mold of some sort. Again I'm using my cupcake pan, but you can use anything really. I suppose you could even use a plastic container if you didn't have a silicone pan.
  • Measuring cup, large measuring cup, whisk, spatula. 
First you need to heat 3/4 of a cup of water to boiling. I used my large plastic mixing cup and microwaved it till it was boiling because I was feeling lazy. Once the water is boiling you want to dump your gelatin into it and whisk it up so there are no lumps. Be careful not to splash since it is very hot.

Water and gelatin all mixed up
Now you want to mix in your 1/2 cup of soap, using the spatula to make sure you get every drop.

Just dump it in
Now mix it up, making sure there are no lumps but do not whisk it till it foams, otherwise your finished product will have a sponge like texture. 

I let my son whisk it up for me
Once everything is mixed together pour it into your molds. I ended up filling five of the slots up almost full, which worked out pretty well I thought. You can fill them however you want, I wanted them bigger so I could cut them in half but still be thick enough to easily hold in tiny three year old hands.

The color looks weird here, but they were actually a light pink once removed from molds
Now the next step is optional though I highly recommend it if there are other people in your house. Since I know my husband, I made a large sign that said "Do NOT eat, soap NOT Jello." If It was just me in the house I wouldn't worry about it, but I'm of the better safe than sorry mentality.

No eating the soap please
You'll want to put the whole mold/container into the fridge to both set up and keep them a little firmer. I've heard of people storing them in the freezer and I may try that at some point but the fridge worked perfectly. Once they are fully set up you are free to text them out. 

All done and ready for the fridge
I have never seen my son scramble that fast to get into the bath tub as when I told him he could use a jelly soap. As a shampoo bar these worked great, they do dissolve faster in water than I originally thought they would but they were so cheap to make I'm not overly concerned. He loved washing himself with it and that's really all that mattered. On a side note, I've heard gelatin is really good for your hair and nails, so I'll keep an eyeball on his hair and I'll report back to you if I see a difference. If you want to see the recipe that inspired this post, you can do so here. I'll probably be replicated more recipes from that fancy soap store (starts with an L if you haven't guessed yet) in the future, what would you like a copycat recipe of?