Good morning ghouls and goblins, this week's Mani Monday is inspired by my favorite monster story; Frankenstein. First kiddies, Frankenstein is the scientist, not the monster. The monster is Frankenstein's Monster. Sorry, just a pet peeve of mine. As you know, the monster was created by stitching pieces of different people together then working some science mojo on it to bring him to life. Great book if you haven't read it yet. So today's manicure will be a two toned french manicure with "stitches" connecting them. This isn't to hard, just takes a steady hand and some patience. And if it looks a little rough that just adds to the spooky charm.

For this manicure you will need:
- Base color. I used my usual ELF nude color that I seem to almost always use.
- Contrasting color for the tips. I used my ELF nail polish in orange to make them extra Halloweenie
- Black nail polish
- A thin paint brush
- A piece of paper of some sort
- Clear top coat
- Nail polish remover

First, apply your base color. I like to do three coats to make sure it's smooth and streak free. Just remember you can't go back and fix any mistakes so pay attention to what your doing. Let it dry completely before you move onto the next step.

Now apply the contrasting color in a straight line across the tips of your nails. Remember, it doesn't have to be perfect but, if you really want it straight use a piece of tape to cover the area you don't want painted. Make sure you can't see any of your base color through it, then let dry completely before moving onto the next step.

Put a blob or two of your black nail polish onto your scrap piece of paper, this will serve as your palette. Don't put to much nail polish down, it will start to get dry and goopy after a bit so only put down enough for two nails at a time.

Dip your brush into the polish and try and flatten the brush a bit before you paint a thin black line along where the contrast color touches the base color. Try and keep it as even as possible, but don't stress making it perfect. The roughness gives it a spookiness.

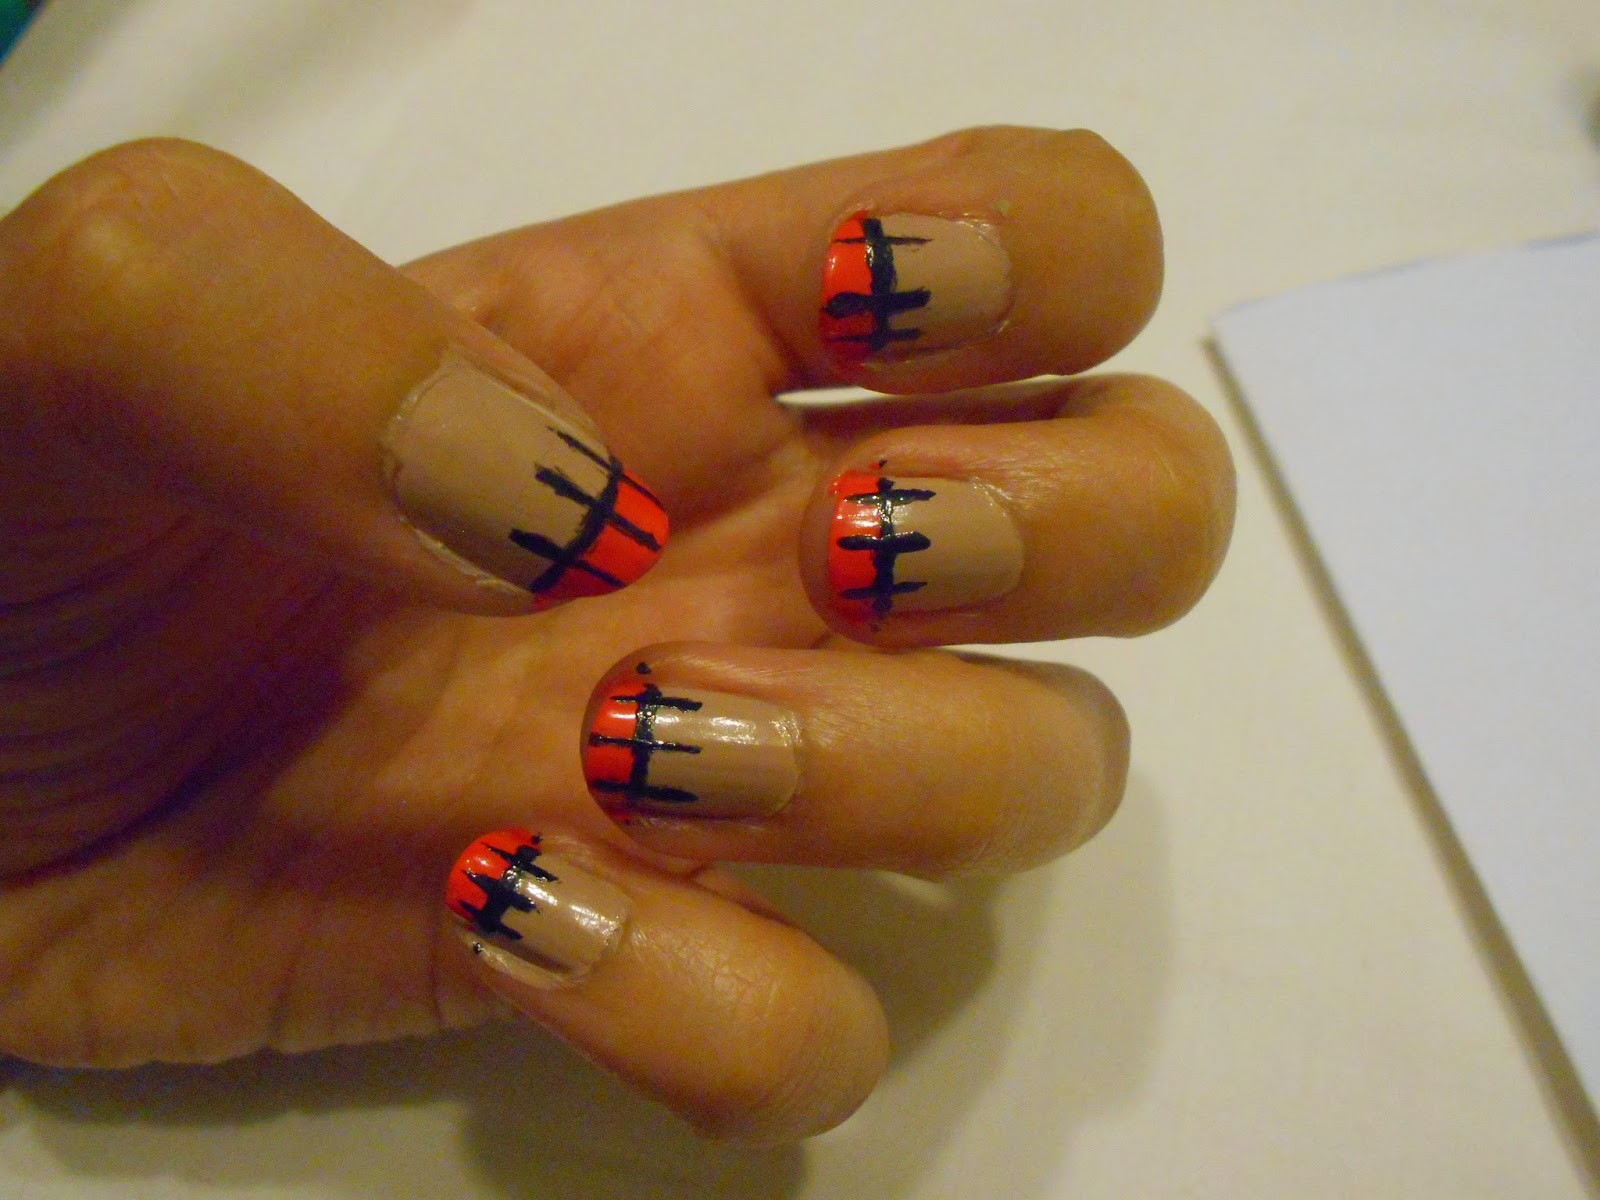
Now paint three "stitches" connecting the contrast color to the base color. You can make these as long or as short as you want, I winged it and had different lengths to mine. Any more than three and it starts to look crowded but less than three looks incomplete so try and stick with just three per nail.
Throw on some top coat to protect your hard work and clean up any polish on your skin with some nail polish remover (I used the brush I was painting with so I could clean two birds with one stone) and you are all done. Go show off those amazing monster nails!
No comments:
Post a Comment